![]() Week 10 was posted by Charanjit Chana on 2018-01-01.
Week 10 was posted by Charanjit Chana on 2018-01-01.
TL;DR: Cull, edit & share.
Chances are there's a camera in your hands or your pocket right now and if not, then you'll likely have a dedicated camera near by.
Taking photos has become an ubiquitous hobby for a large chunk of the worlds population and now that sharing involves just a few taps, the sheer number of photos and videos being published each year, month, week, day, hour, minute and second is astonishing.
Back in 2013, Prolost published an article on how to take good photos for under $1,000. The advice still stands up 4 years on, but with smartphones dominating the casual photography landscape, let's look at getting the most from both a DSLR and your mobile device of choice.
The best advice from Prolost is simple:
- Get a body
- Invest In fast glass
- Open wide
But that's not all, shoot raw, choose your focus and edit later are also important things to consider. Let's kick off with how to make the most out of your DSLR.
How much does a lens matter?
While the body or sensor matters, having 10, 20 or 50 megapixels is not going to turn you into a pro. My own journey in Photography saw a jump from an ageing 6 megapixel Nikon to an 18 megapixel Canon but was there a real difference? Both cameras were sharp enough with kit lenses but neither could create stunning photos. No more so than my smart phone that's for sure and especially for in the moment shots.
Enter the nifty fifty. Both Canon and Nikon offer 'cheap' 50mm lenses with a f/1.8 aperture that allow tons of light in (see video below). This instantly gives you a couple of things to play with. Firstly you can have a shallower depth of field and/or get that bokeh fix you've been craving. Secondly you can get more light into the camera. More light means you can have a faster shutter speed. You can freeze motion or combat the shakes with a wider aperture.
Having used Av mode on my camera for a couple of days, there was no going back. It's been 4 years now and I rarely stray from being able to control the aperture and when I do it's to make the most of manual mode.
Aperture vs Shutter vs ISO
When it all boils down to it photography is just about capturing light. You (or your camera) can adjust light in order to maximise or minimise the amount of light entering the camera and it's the aperture, shutter and ISO settings that can give you granular control. Even more so when you combine the three.
While the aperture will physically change the size of the hole and literally increase or decrease the amount of light coming in, the shutter can stay open for longer or shorter periods effectively having the same effect. The difference with the shutter is this can lead to motion blur or fuzzy images when taking photos without a tripod. The Slow Mo Guys on YouTube do a great job of explaining how it works:
The ISO controls how sensitive the sensor is to light. A lower ISO gives you a sharper image but requires more light (large aperture, longer shutter speed) and a higher ISO can give you the grainier image but allows you work in lower light without having to have a slower shutter speed.
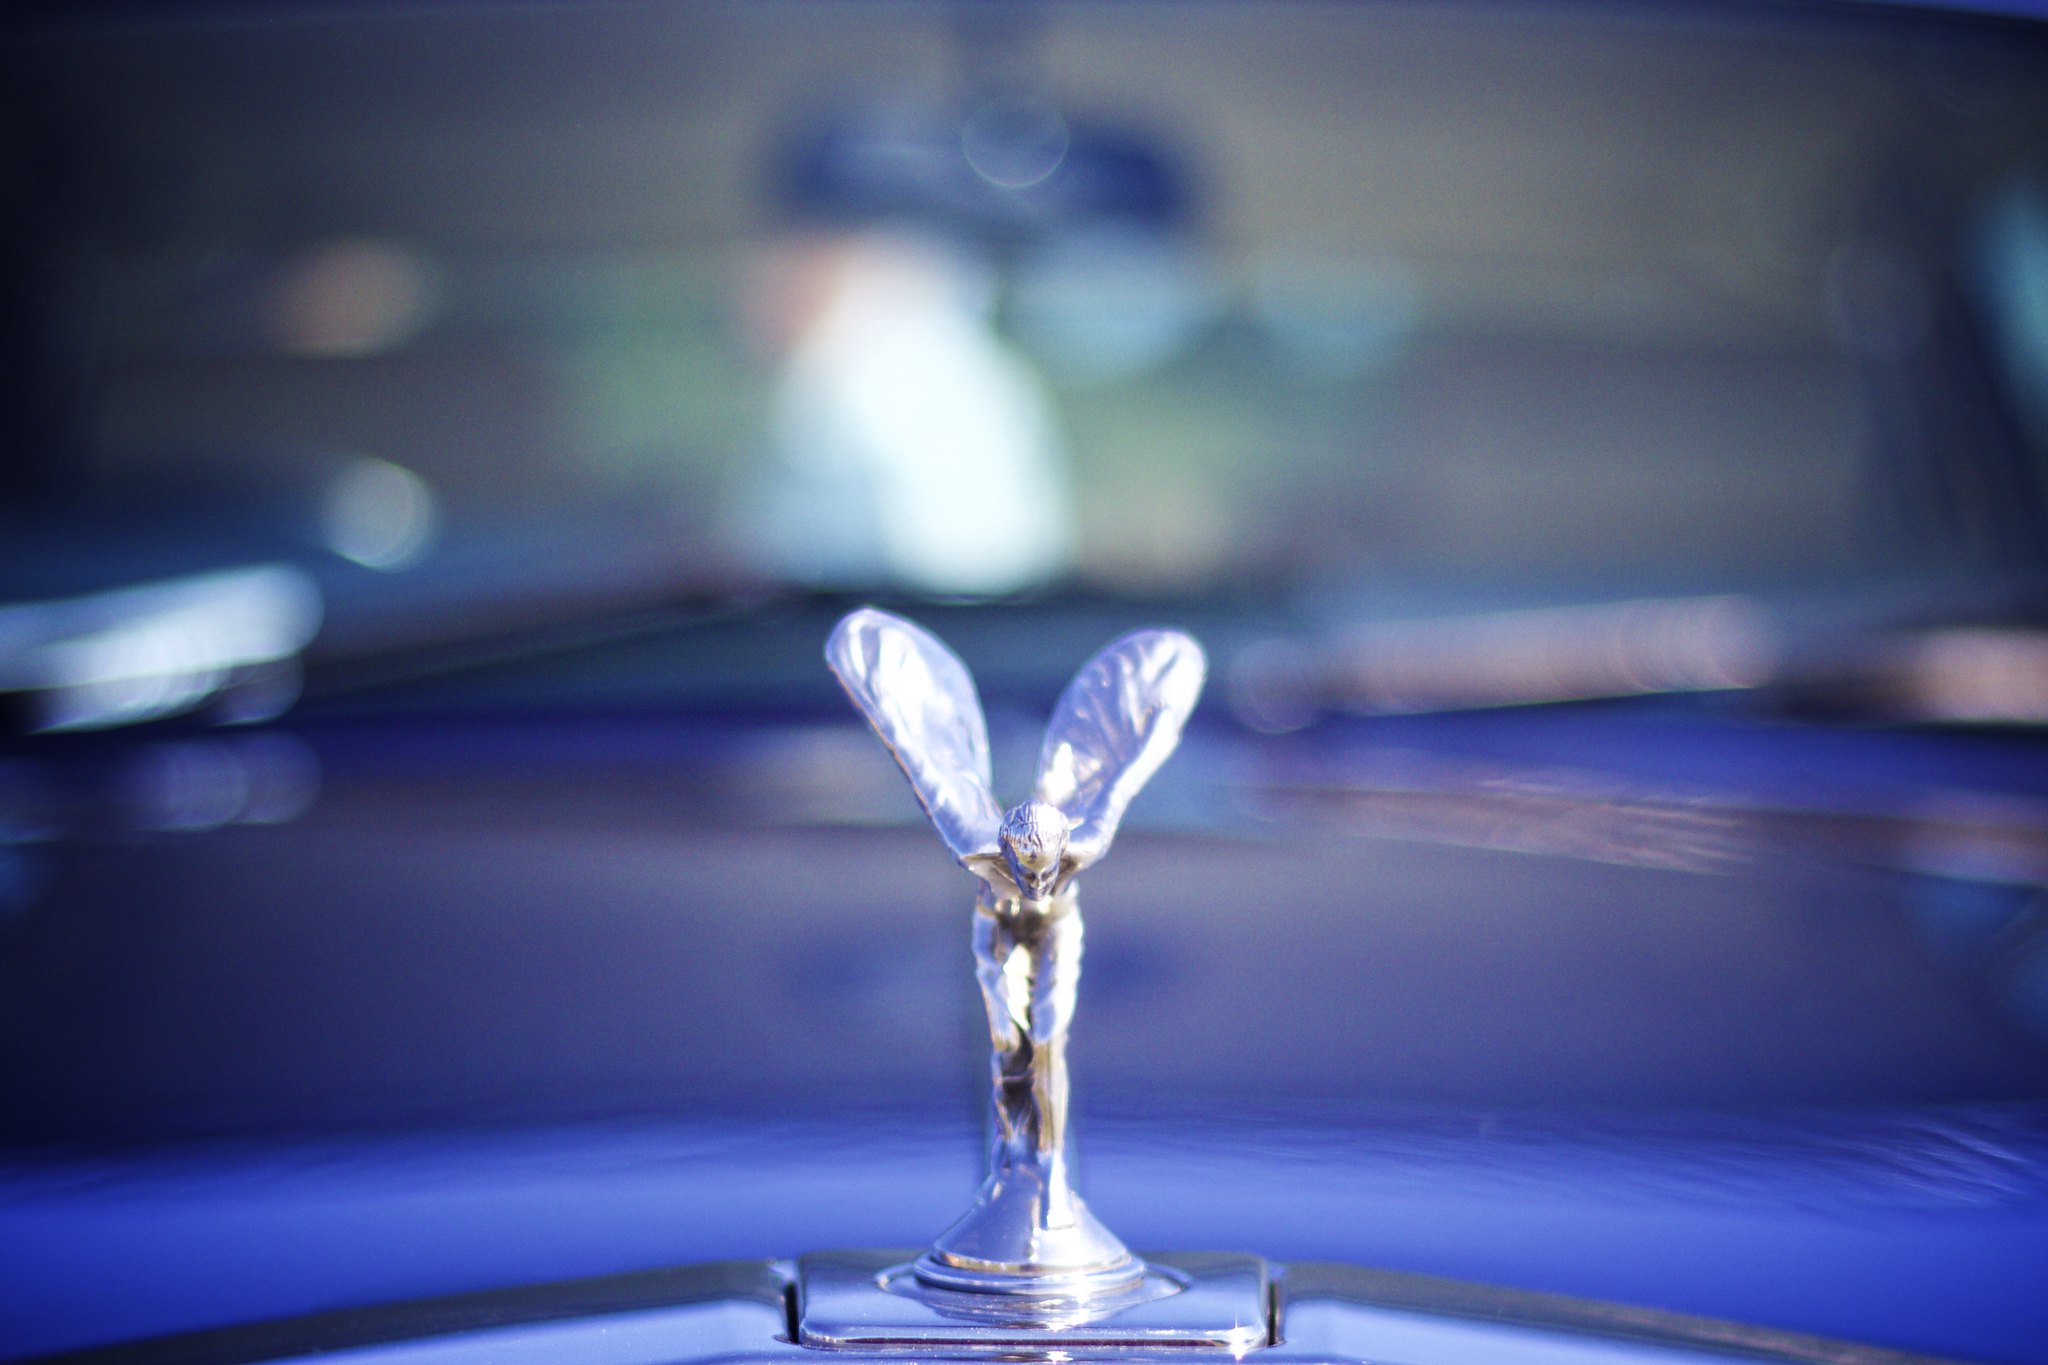
Combining all three can be a scary prospect, but your aperture is a great place to start. Below is an example from my own collection where the aperture was wide open at f/1.8. This allowed the camera to select a shutter speed of 1/4000th of a second. The focus is exactly where it's needed.
Shoot RAW
Shooting RAW is probably the third biggest change I made when shooting photos. While JPGs look great out of the camera, RAWs often look subdued. What it might lack in punch it makes up for in data. RAW photos contain all of the information that the camera had available at the time, nothing is lost and it lots of cases, mistakes or imperfections can easily be corrected. As you'll discover later, there are a handful of adjustments you can make to really make your photos stand out. More than a camera can do when creating it's JPG version, that's for sure.
Advice for any device
No matter if you're working with a DSLR, a pocket camera or a smart phone, here are some things to consider at any level of photography:
Control where you focus
While all modern cameras are excellent at focusing automatically and even do a decent job of selecting the important parts of the scene, nothing will beat your own attention of detail so choose where the focus is. On your phone it's as easy as a tap but you're likely to be more restricted on a camera depending on the number of focus points it offers. Get to grips with how to focus and you'll be able to select the right place in a second or so.
Backup your photos
In the first world, there are few things worse than loosing your memories. While Google Photos offer free storage for photos up to a certain size you're going to need to think about a solution that works for you. Apple of course have their own in built solution, provided you stump up a monthly fee and Amazon now also offer free unlimited photo storage for Prime customers. In the US unlimited photo storage can be purchased without a Prime account, whereas in the UK it's purely a perk of being a Prime member. I use the Apple and Google for all mobile photos and Amazon for my DSLR.
There are also cloud based backup services like Backblaze that will do this for you, but I found them problematic when using an external drive to store the photos locally.
Speaking of which, is also a good idea. Apple make it easy in their ecosystem with the Photos app, but however you do it, just make sure you do it.
Delete, delete, delete
Aperture priority mode was the best advice the article from Prolost bestowed on me, but the close second was to delete photos. OK, the advice was to actually shoot like crazy, but when you're done pointing your lens in people's faces sit down and only keep the best photos. Storage may be relatively cheap but when it comes time to look back through them, looking back through hundreds of great photos is a more appealing task than looking back through thousands of mediocre ones.
Taking Better photos on your mobile
Today, it's not impossible to take great photos on any phone available in the last 4 to 5 years. For one, the 'restrictions' of an older device might even drive your creativity by any 2016 or 2017 Model is going to be capable of taking a stunning photos by default, no matter the subject or amount of light available. Panoramas, no big deal. Action shots? Easy!
If you use an iPhone 8 Plus or the iPhone X you can fake it till you make it with artificial bokeh using Portrait Mode. The Pixel 2 from Google can do the same, just with a single camera instead of a dual lens set up.
Adjust the exposure
Much like choosing your aperture, you can choose the exposure on your phone. Using the iPhone's Camera app as an example, just tap to auto set the exposure. Choosing different points on the screen will give you different levels of light. You can also slide up and down to increase or decrease it. Another nice feature is to hold your finger on the screen until the camera locks the focus and the light coming in.
Edit, edit, edit
Editing photos once they're taken is the norm now and so easy in the digital age. Whether you use respective Photos apps from Apple and Google, Lightroom, Photoshop or Affinity Photo we all want our photos to pop.
When it comes to working with large RAW photos from your DSLR, then the amount of control you have can be overwhelming but it's worth at the very least looking at the following settings where possible:
- Levels
- Tint
- Shadows
- Highlights
- Saturation
- Blacks
- Whites
- Clarity
- Vibrance
- Sharpness
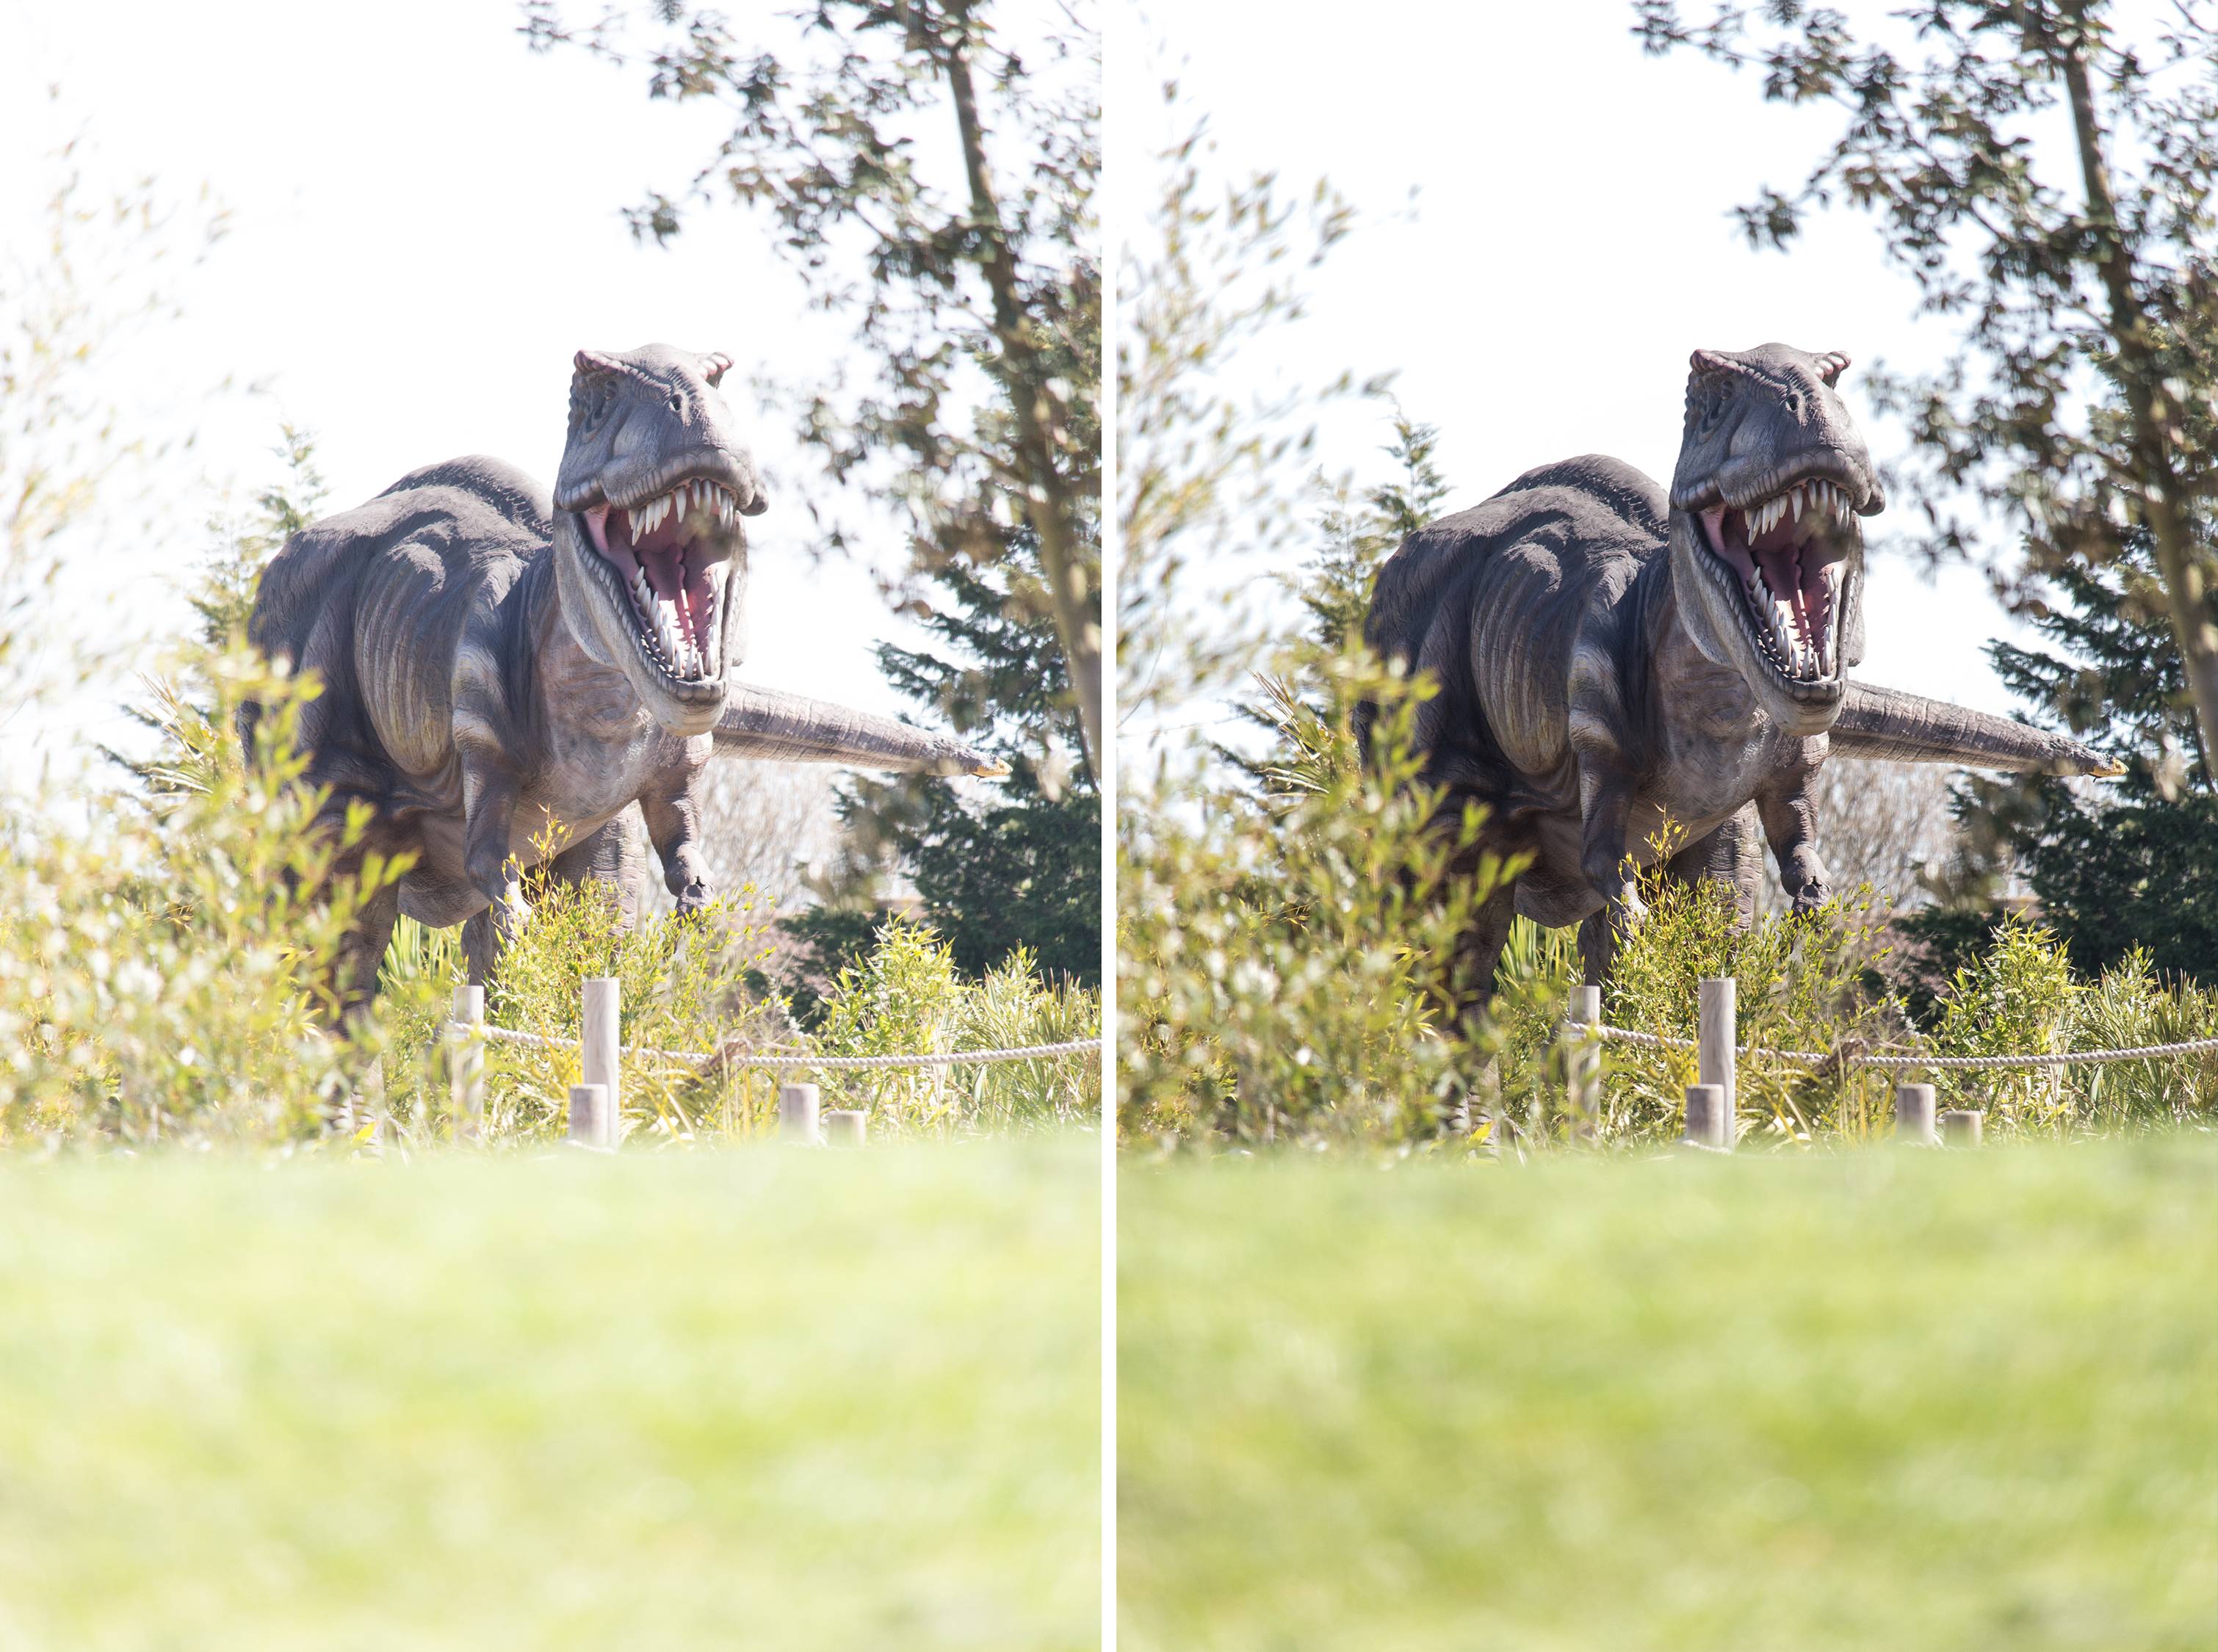
Don't overdo any of them, but just these 10 settings can make the world of difference to any photo. Having adjusted just these settings in the majority of photos I've taken you see how much of a difference knowing the basics can make to your photography. Just compare the photos I shared on Flickr in 2012 with the ones I from 2015. Below is a photo without any edits (left) compared to one that has had just 8 of the above settings adjusted.
My personal workflow when sharing photos from my smartphone is to edit using the device's in built tools first. Correcting colours and contrast then cropping and straightening. It takes seconds most of the time and if I'm lucky the auto button will do it all for me. Not the case usually, but always worth a try.
Just cropping and spending more time adjusting your photo can make even more of an impact:
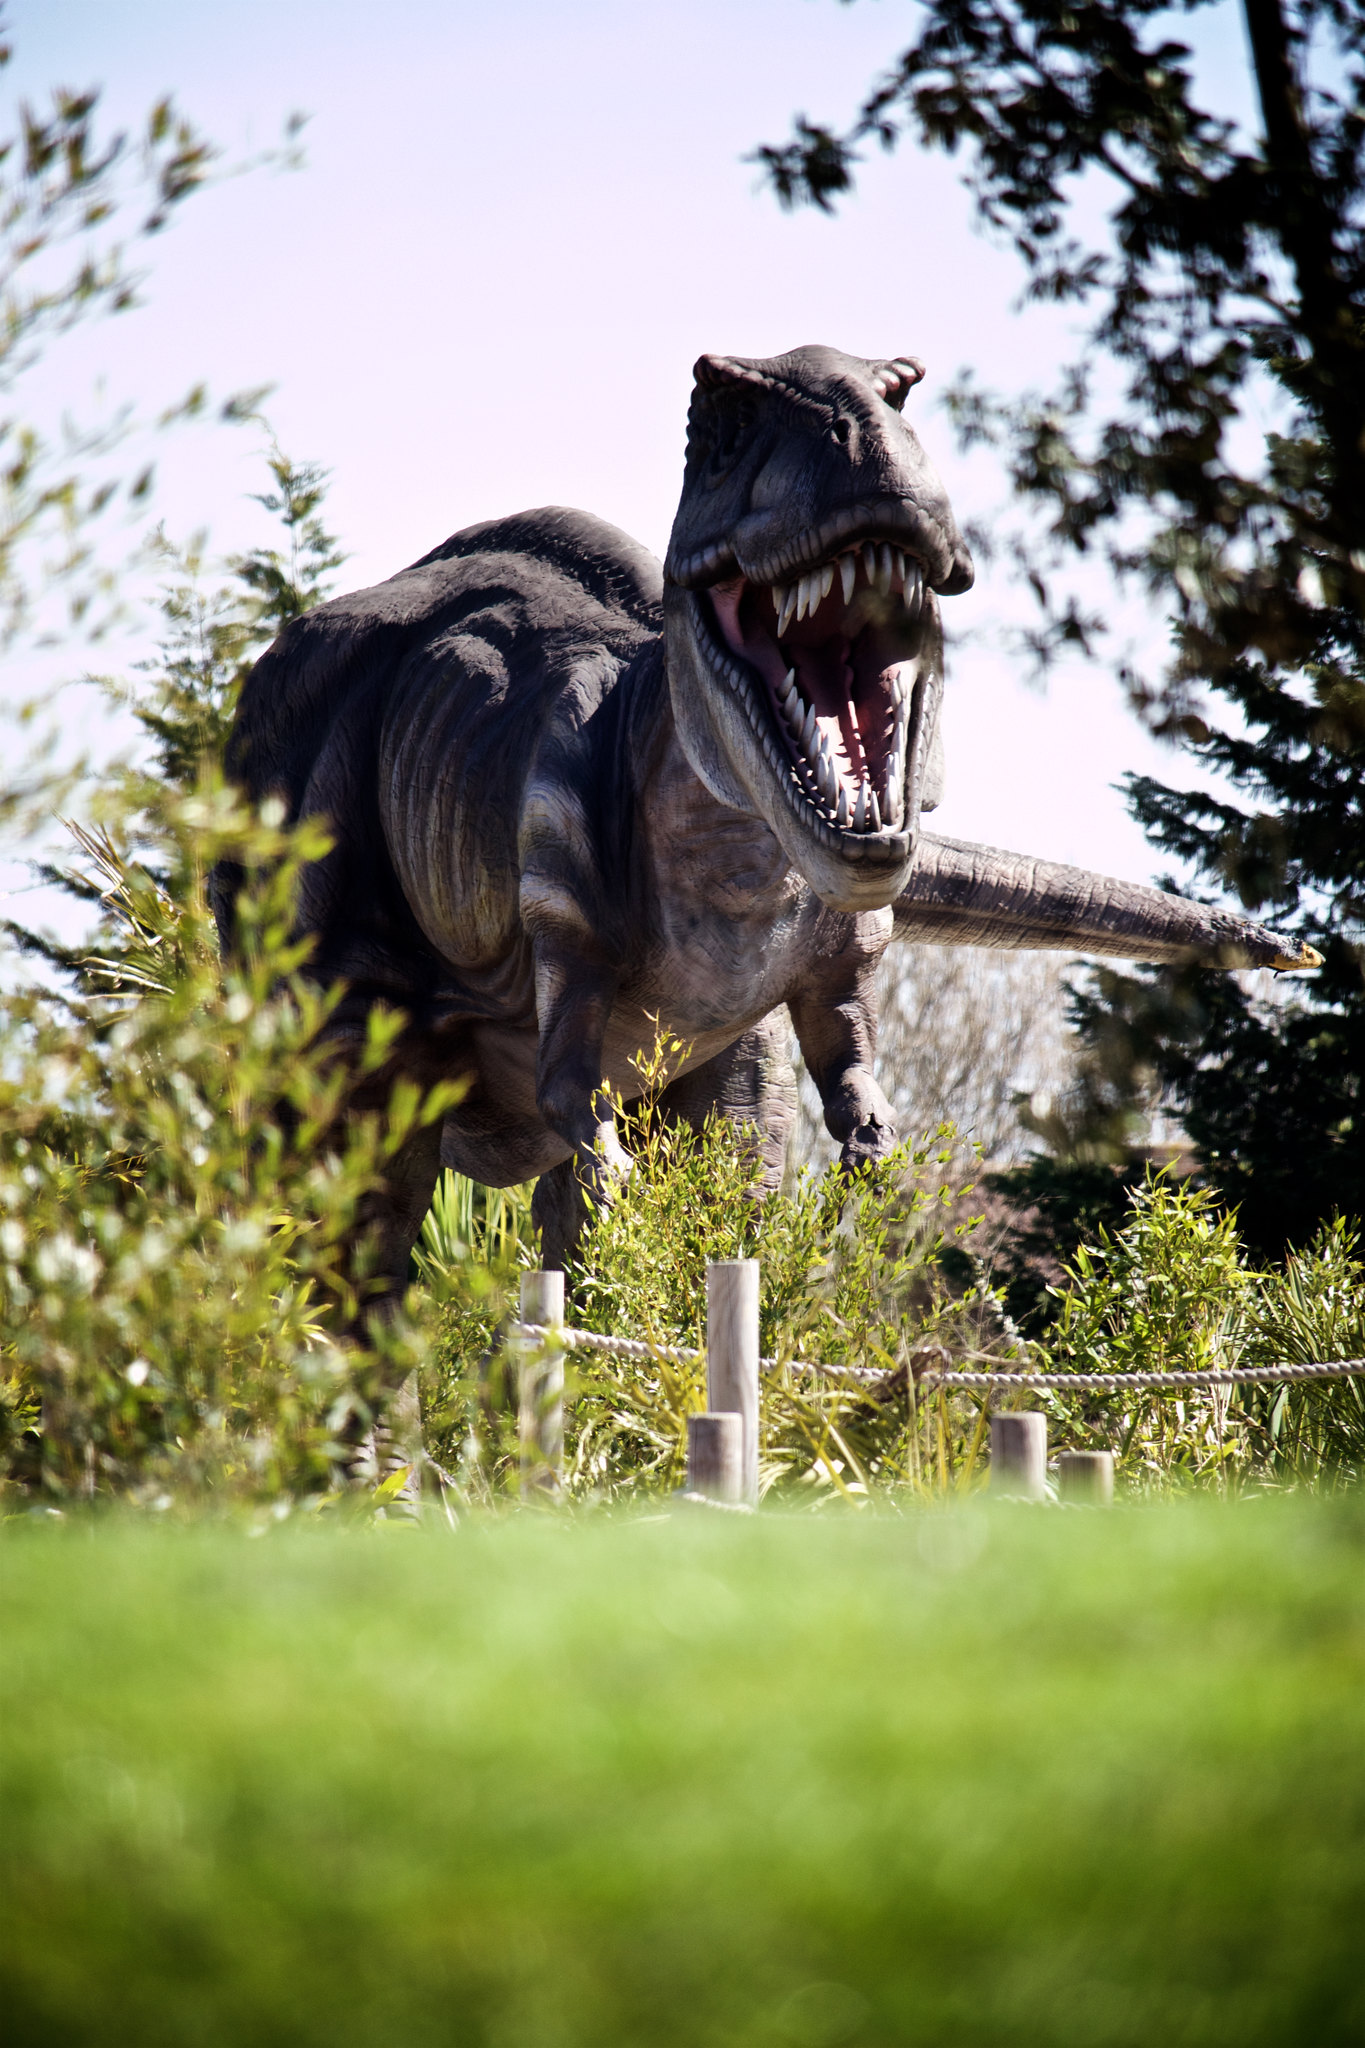
Once they're edited, even when sharing to Instagram the need for filters is gone and using their more granular editing options means the structure and sharpness can be boosted a little more.
More tips, tools and advice
If you've found this article interesting then you might be interested in knowing more from experienced and seasoned professionals. Here are some great YouTube channels that do a fantastic job of either reviewing equipment or educating in the field:
- Adorama
- James Popsys
- Jared Polin
- Kai W
- Lok Cheung
- Mike Browne
- Nick Page
- PhotoRec TV
- SLR Lounge
- Tony & Chelsea Northrup
Get out and shoot
Be it your smartphone or your dedicated camera, just get out and shoot. With all things, practice makes perfect and the more photos you take the more you'll develop your style and learn to make the most of what's available to you.
And shoot away because remember, you'll only be keeping the best memories anyway :)
Tags: photography, tutorial, photography, tutorial